
My Sponge Roller Wet Set
- May 14, 2015
- by
- The Glambassador
I’ve been asked several times to do hair and makeup tutorials. As I’m not able to do a proper video tutorial as of yet, I thought I’d at least do a photo tutorial of my typical sponge roller wet set. My hair is shoulder length and cut in the traditional middy cut.
My hair is naturally curly. You can see the curl even on my wet hair. For this set I simply used LottaBody Olive Oil setting lotion concentrate mixed with water. I used two different sizes of sponge rollers. For the back I used 1 1/2 inch rollers and for the sides and bangs I used 1 inch rollers.

I start by sectioning off my hair in 4 sections.
1 – bangs/crown
2 & 3 – sides from end of crown section to behind the ear
4 – the remaining back section
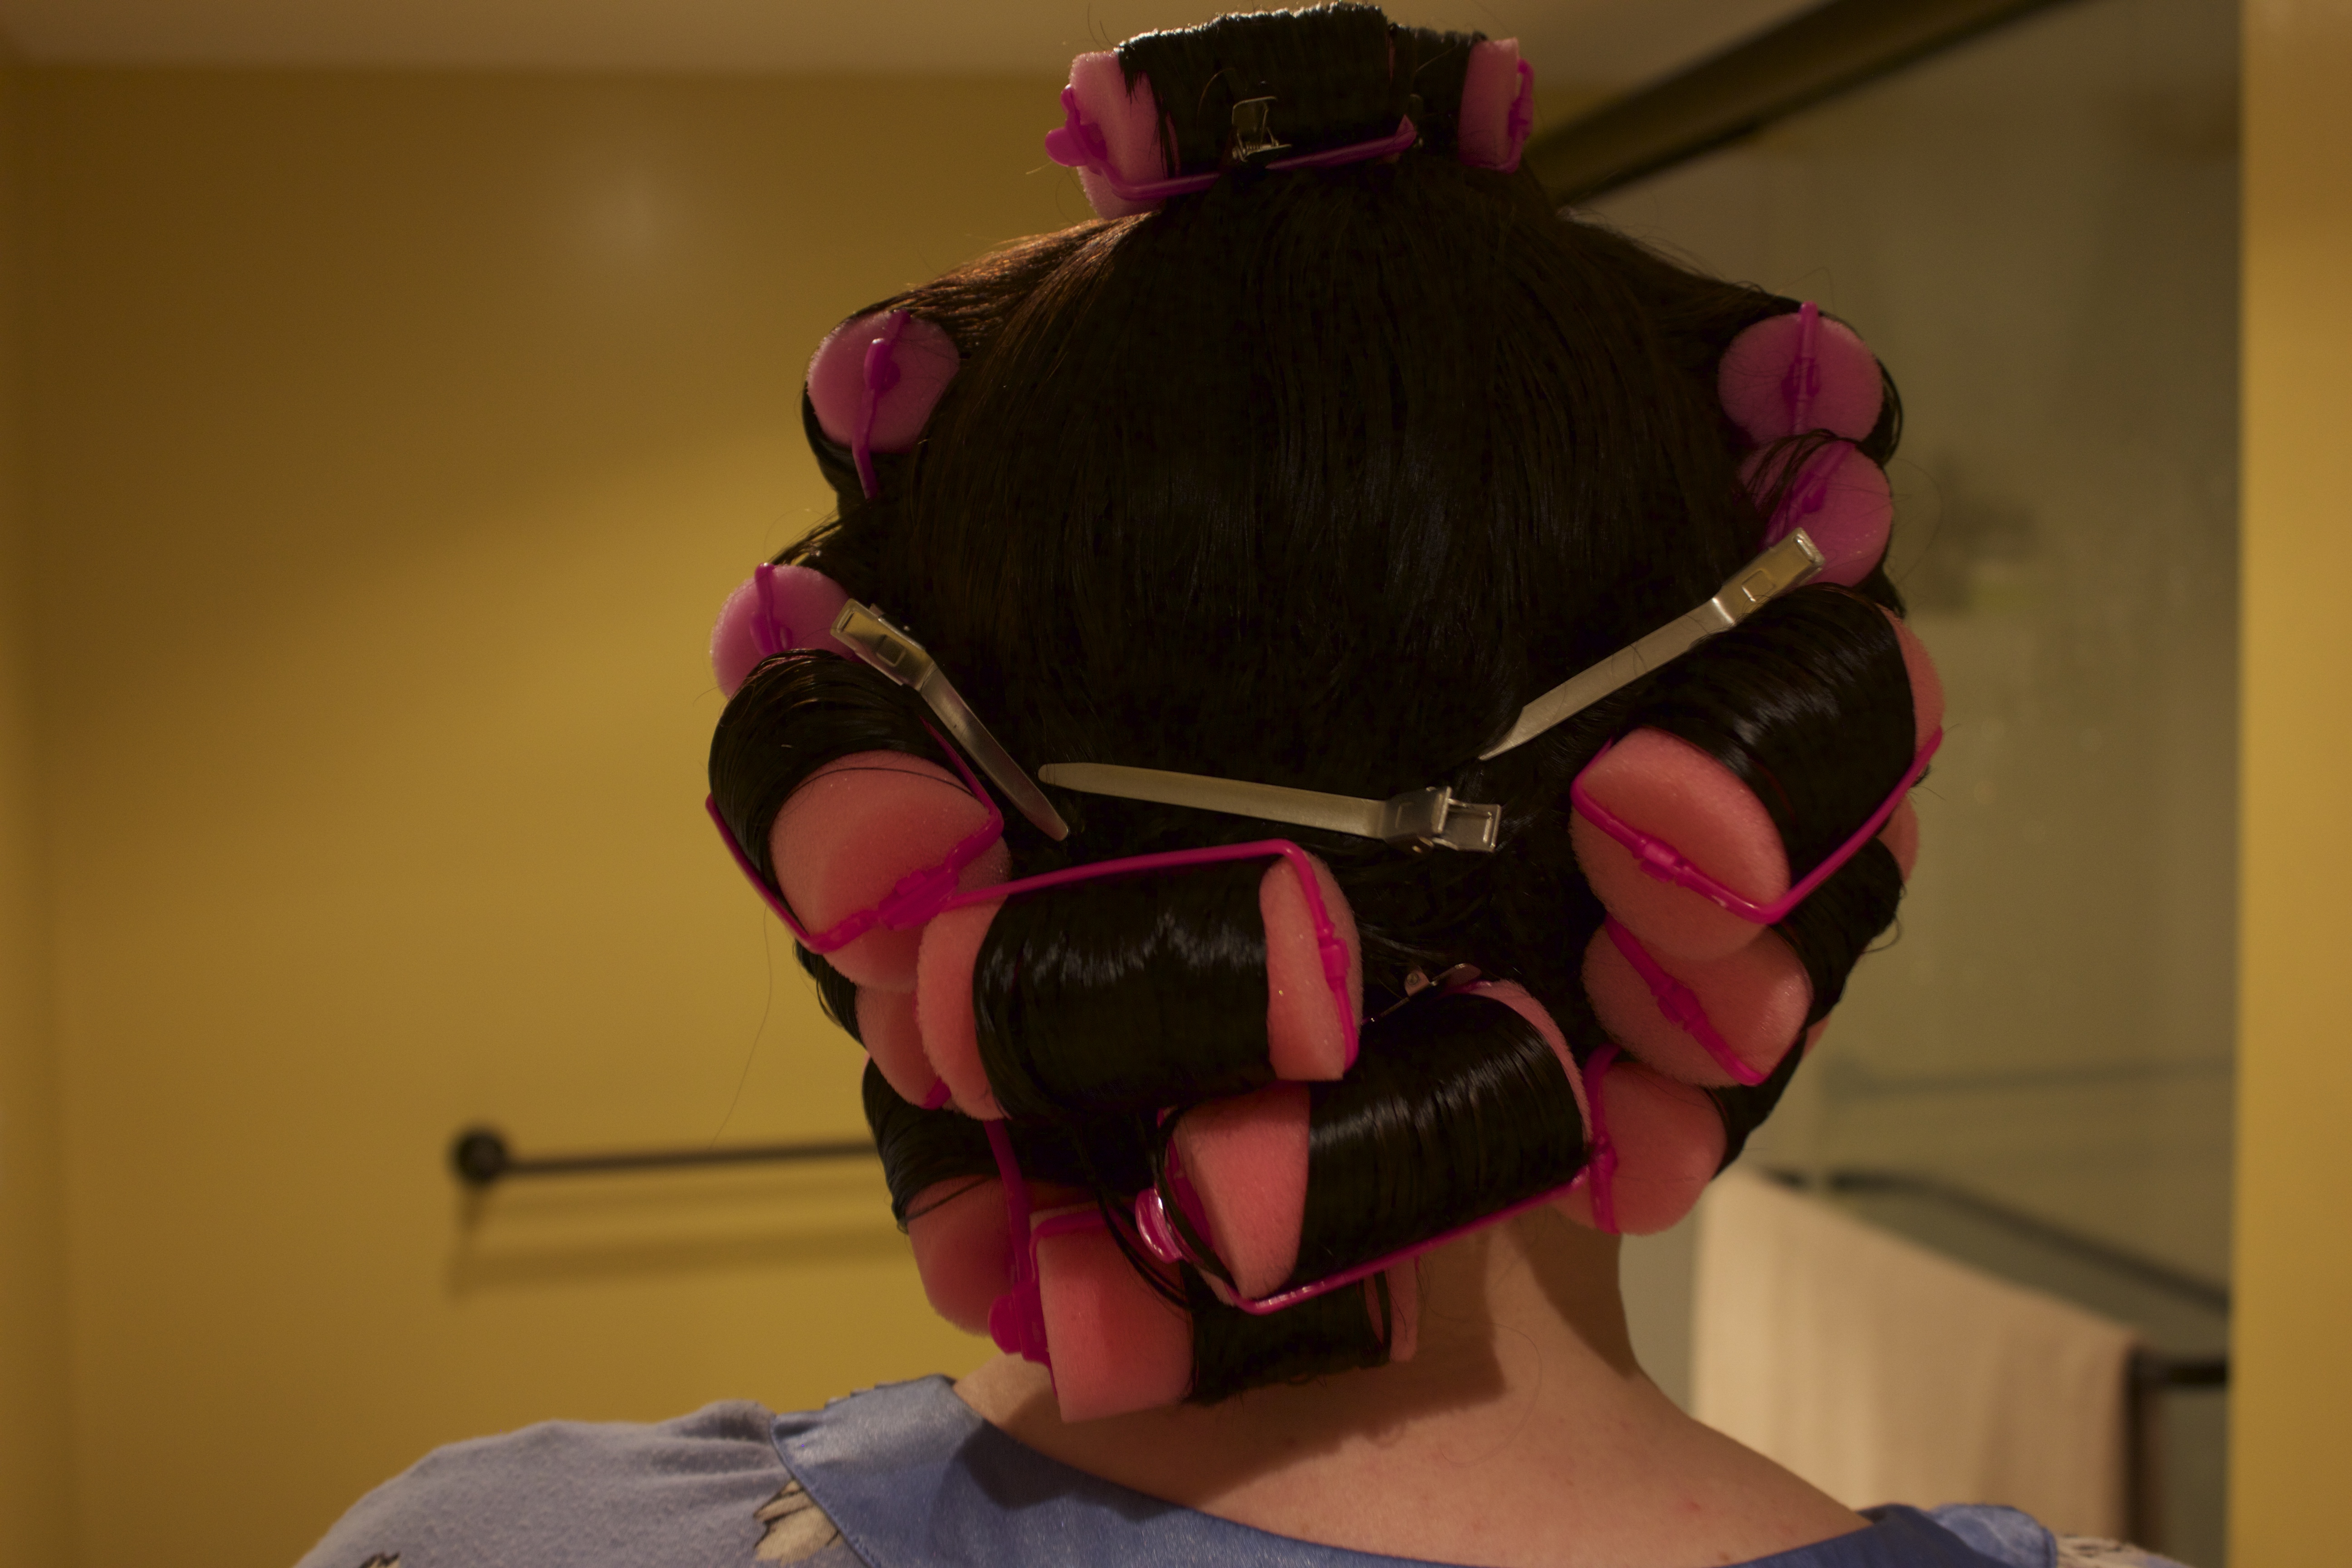
 I start with the back section. There will be three rows of rollers. The first row is rolled down, the second is rolled up and pinned with a pin curl clip (explained below) and the third row is rolled down. This sequence will create a nice wave effect. I also use my rat comb to smooth down the top crown then place duckbill pins to hold it down. Since my hair is so curly this will help to create a nice smooth effect from the crown down.
 Since I rolled the hair upwards in the second row I need to secure the plastic portion of the roller in place by using small pin curl pins or bobby pins, otherwise the roller will just flop down – you know gravity 🙂


Now for the sides and bangs, I roll the hair down in the traditional fashion. However, I don’t like having a crease in my curl which happens when you secure the plastic clip in place.

To remedy this, after you secure the plastic clip, take the bar and pull it downwards your head.

Once it’s sitting against your scalp, clip it with a small pin curl pin or bobby pin.


I continue with is on the other side and for my bangs. So here’s the finished set on all sides.


Now I will sit under my bonnet dryer for about an hour on medium heat and then 15 minutes on cool to set. Make sure that your hair is COMPLETELY dry before you take the rollers out. Since LottaBody is a lighter setting lotion I can get away with 1 hour under the dryer. Sometimes I use a combination of a straightening balm and anti-frizz serum which is thicker, then I need about 2 hours to dry. Sometimes I’ll even let it dry naturally and just put a silk scarf on like this.

This is my typical wet set and I do this once a week. I usually don’t need to re-set or curl my hair for the rest of the week unless I’m doing a very specific style or the humidity has reeked havoc on my hair. At that point I might use my hot roller set or just do a hot pin curl set with curling tongs depending on what style I’m trying to achieve.
A quick bush out to form the curls, throw a flower in and VOILA!


Discover more from Chronically Overdressed
Subscribe to get the latest posts sent to your email.
You may also Like
My Favorite Lipsticks for a Vintage-Inspired Look


5 Comments
anastasiias
15th May 2015 - 3:11 pmGorgeous! This hairstyle suits you a lot! Both curls and with scarf!
Vintage Hairstyling for Naturally Curly Hair | Musings of a Chronically Overdressed Dame
6th Jan 2016 - 3:25 pm[…] Then I can start to roll my hair into my sponge rollers. I have a few patterns I use regularly depending on the desired outcome. I will do a separate post on my various sets, but you can see my regular wet set here. […]
My new favorite hairstyle ~ Tutorial | Musings of a Chronically Overdressed Dame
21st Jul 2018 - 6:42 pm[…] create the wave in my fringe I set my hair like I normally do, aside from my fringe – (see my set here) – and then I put a hair net on and slightly push it back along with the rollers. This was a […]
Alexis Malinowski
30th Jan 2021 - 1:17 amI have been searching for a vintage tutorial on thick curly hair. I can set my hair, that part is fine…but I cannot brush it out. I just end up with a huge poof. How do you do the brush out part?
The Glambassador
7th Feb 2021 - 4:53 pmI have a brush out video on my YouTube channel, http://www.youtube.com/theglambassador Check that out and see if it answers your questions. But honesty it depends on how you’ve set your hair and what size your rollers are. The key to it is to just keep brushing.